
A kitchen renovation project can be overwhelming. This is especially true when you are working within a specific time frame or a limited budget. Hence, it is crucial that before the actual renovation project begins, you plan out every step of the way.
Moreover, you will also have to clear out the contents of your kitchen, which all on its own, is a terrifying feat. You will also have to think of the “when,” “where,” and “how” of the scenario, which means you will have to figure out both the specifics of temporarily moving out your belongings and the renovation process itself.
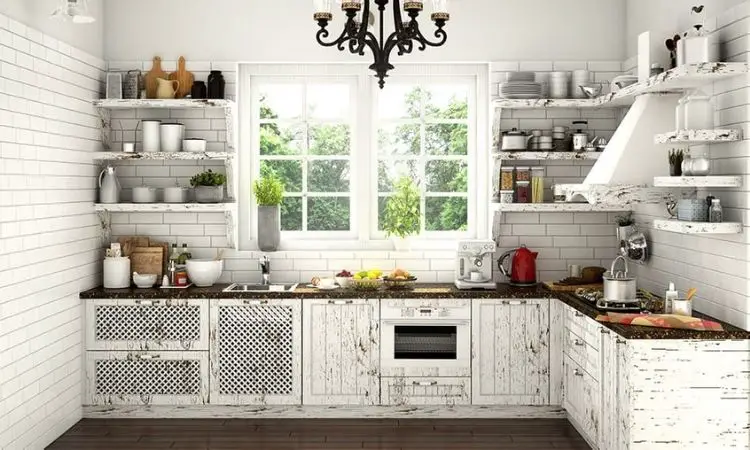
Here are 5 Subtle Kitchen Renovations you should check out!
How To Clear Out Your Kitchen For An Upcoming Renovation Project
To help make the process a lot easier, we’ve come up with a comprehensive guide you may use while clearing your kitchen for the big renovation project. Here they are:
Step 1: Pick Out The Essentials
Before anything else, you will want to identify the items you will still use in your temporary kitchen throughout the renovation project. This could include pots, pans, skillets, cooking utensils, the coffee maker, a tea kettle, serving plates, storage containers and bags, and mixing bowls, among many others.
 Set these items aside so that you wouldn’t accidentally pack them up later on. You may also pull out some dishes, silverware, and drinking glasses to use, but it would be much advisable for you to use disposable cutleries, plates, and cups instead.
Step 2: Gather Packing Materials
Before you begin clearing out the kitchen, you will want to have the necessary packing materials ready to go. So, make sure to have several packing boxes, corrugated cardboard sheets, packing paper, bubble wrap, and heavy-duty tape. Having these on hand b will make the process quicker and much more manageable.
Step 3: Take Down Hanging and Wall Decorations
You will want the kitchen free of anything that may get damaged during the renovation process. Begin clearing out your kitchen by taking down any decorations on the walls. Also, take down curtains and their rods, blinds, and other decorative pieces within the kitchen. This step is extremely crucial, especially when you are planning on using these items after the renovation.

Step 4: Empty, Sort, and Declutter
Next, clear out your drawers, cupboards, shelves, and countertops. Sort the items you find by category or use. While sorting through your kitchen belongings, take the chance to identify which things you still plan on keeping and which items you may sell, donate, or dispose.
Decluttering will make it much easier for you to pack your items and make it much easier for you to transport and store your belongings.
Step 5: Find A Storage Space For Your Items
Before you continue to pack your items for temporary storage, it would be ideal for you to know where exactly you can place your stuff first. A perfect place to store your belongings, of course, would be a storage unit in a self-storage facility near you.
You may be wondering, “Why would I want to spend on storage when I can easily temporarily keep my stuff in the garage?” Well, as unnecessary as it may seem, putting your items in storage may actually make things easier for you in the long run.
fter all, a storage facility will impose maximum cleanliness and will have features like climate-control and round-the-clock security. That means your belongings will be safe from anything that may cause them to get damaged or to go missing. Keep in mind that most kitchen equipment pieces are expensive and very fragile, which means getting them fixed or replaced will be a costly endeavour. So, why not prevent it by making sure your items are safe from the get-go?
However, if a storage unit isn’t something you’re comfortable with using, you may store your stuff in your garage or lease a garage or a shed, which you may use for temporary storage. Do take note, though, that a residential garage will not be as secure as a self-storage unit.
Step 6: Hire A Van To Transport Your Stuff
Once you have figured out where to store the items from your kitchen for the renovation project’s duration, you may start planning when and how exactly you will want your stuff transported from one point to another.
The most ideal option would be to hire a van for a day, plan to drive it yourself, and ask a few of your mates to help you out with the loading and unloading of the stuff from your kitchen. With you behind the wheel, you have complete control over everything, including when you want to start moving and which route you want to take. By renting and driving a van yourself, you are also immediately eliminating the stress and anxiety that comes with entrusting your items to a stranger.
Alternatively, you may hire a van with a driver or a man and van. Such services will often include the hauling and transportation of your items, which means you almost wouldn’t have to lift a single finger!
Step 7: Pack Up The Dinnerware and Other Kitchen Tools
Once you have arranged the transportation and storage for the items in your kitchen, you may begin packing up smaller items like plates, silverware, bowls, mugs, glasses, and all the other kitchen tools you may have.

While packing such items, remember to cover fragile or breakable pieces individually with both packing paper and bubble wrap before packing them safely into a box that has had its bottom and sides fortified with tape. Fill in the boxes with packing peanuts or crumpled paper if necessary.
For cookbooks and recipe cards, you will also want to pack them all in a large box that has had its bottom and sides reinforced with tape as well.
Step 8: Prepare Appliances and Furniture Pieces For Transport
You will then want to make sure all the kitchen appliances and furniture are also packed and prepared for transportation. If possible, disassemble your furniture and appliances and cover each part individually with packing paper to ensure it stays safe. You will also want to cover fragile items with bubble wrap to provide them with extra protection.
Meanwhile, clean and empty out larger appliances like the fridge, dishwasher, and oven before sealing them with protective covering like plastic wrap, bubble wrap, or moving blankets. Make sure to unplug any electrical equipment before doing anything.
Once you have cleared out and stored the items in your kitchen, nothing should be able to stop you from beginning your kitchen renovation.