Mason jars are part of the kitchen decor. Their aesthetic appeal has been alive and well throughout the decades.
With time, we invented numerous fashionable ways to use them. Whether you want to stash grandmother’s secret herbs somewhere safe, line up lime pickles, honey, or even make a DIY backyard picnic drink in it, it has got you covered.
A mason jar is a work of elegant craftsmanship in its shape and structure, but keeping it nice and shiny might be tricky. It’s not exactly the most convenient to clean; the same body we adore comes back to haunt us for its many nooks to reach.
And soon, we look for an excuse, like relying on dishwashers. But are mason jars dishwasher safe? If so, what kinds? We’re here to dig deep with our fingers into the end of all mason jars.
Quick question:
A) Are Mason Jars Dishwasher Safe? How to tell?
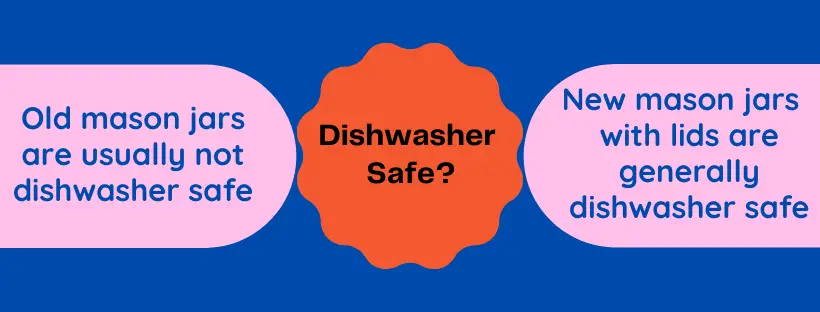
Most mason jars are dishwasher safe, but a good rule of thumb is to notice how old they are.
- Old mason jars are usually not dishwasher safe, especially if you notice the good old wire bail lock system. They indicate their archaic build, and hence you are better off washing them manually.
- New mason jars come with regular lids and are generally dishwasher safe, so that’s cleared now!
B) Well, How About Mason Jar Lids, Are They Dishwasher Safe?
Unlike the main course, the appetizer passes the dishwasher safety test. Mason jar lids are peas in a pod inside dishwashers, and the top racks will come to good use for them. They love the hot water sprays and the brushing; hence, people would boil them first before washing them manually in the old days.
Here’s the catch though, it’s encouraged that you wash them by hands because they are prone to rust the more you wash them. So you’re better off with lighter washes manually then vigorous walkthroughs in the dishwasher for those poor lids.
If you’re wondering how to wash mason jar lids, let’s get to it.
Washing Mason Jar Lids Manually
- If you own multiple mason jars, separate all the lids and put them in a large container.
- Fill the container with white distilled vinegar, enough to soak the lids all the way through.
- Place each lid, ensuring there’s enough room, in the container.
- Set a timer for thirty minutes and let the covers soak.
- After the timer rings, use a soft brush and scrub gently at each edge and corner.
- Wash with clean water.
- Give it a repeat wash with hot and soapy detergent water and air dry after.
Washing Mason Jars in the Dishwasher
This part is of prime importance and attention. Grab the new mason jars and leave the ones with wire bails for your precious sink.
- Give each mason jar and their lids a welcoming bath with mild detergent and water in the sink. This will allow the cleaning agents to soak into the grime and grease, break them down with time, and soften up all the deposits.
- You should place the jars on the top rack where you keep the mugs, but the bottom rack is fine as well.
- Use this opportunity to place the lids in there as well to get both tasks done.
- Of course, you’ll add a detergent, but for the jars’ sake, use a detergent with low acid concentration.
- Let the dishwasher do its job!
C) Why do my Mason Jars Stink?
We love to keep the fragrance of our homemade apple jam inside the mason. Hence, we tend to tighten their lids a little too much sometimes.
As if, a tight lid will keep all the jam and the scent of fresh red apples inside like Aladdin’s genie, forever. The sentiment is widespread but counterproductive. Snugly sealed jars tend to form moisture due to their restrictiveness from the air.
No air means a sweaty, moldy feel, and we don’t want that. Next time, just keep the lids screwed on just a little loose. Air doesn’t take too much room anyway.
But you’ve got a stinky smell that just won’t leave, so now what?
Follow these simple steps to lose any smell from your mason jars:
- Fill a small bowl with half a cup of water and add a liberal amount of baking soda relative to the portion of water.
- Mix them in to create a sticky paste.
- Use a soft cloth or sponge to rub the paste onto the inside surface of the jar.
- Make sure to be thorough in getting every little spot.
- Leave them on the countertop overnight.
- In the morning, give them a nice wash and let them dry out in the open.
- For better results, leave each jar separately without their lids.
D) Are Mason Jars Microwave Safe?
You’ll have noticed a ‘microwave-safe sign on the bottom of mason jars during a routine wash, but be wary; old mason jars can shatter inside an oven. Moreover, we mustn’t remind you never to put the metal lids inside the microwave to avoid unnecessary accidents.
But all that spells inconvenience. We don’t have the patience of thawing out processed foods and heating an old can of soup. We want it done fast. So here’s a guide for different microwave purposes involving mason jars.
Heating up a Frozen Mason Jar
A big NO. The cool body colliding with the scorching heat will soon crack the jar into unrecoverable pieces.
If you’d like to dig into a frozen jar of mangoes on an odd night and would like to avoid a microwave for apparent reasons, the sink is your best friend.
- Fill a big bowl with cold water.
- Place the frozen jar in it, ensuring it dips.
- Relax and choose a show to watch for when the mangoes are ready.
- Replace the bowl of water with a new batch now and then to keep it effective.
- In no time, the chunks of mango will come off, and your show will be ready to stream; enjoy!
For Sterilizing Reasons
Especially for gym buddies and health-concerned consumers, sterilized jars and preserved fruits and vegetables are a necessity. Sometimes, we like sterilizing our mason jars inside the microwave, well, for comfort and convenience.
- First things first, give your jars a manual wash and keep the lids away.
- A spotless jar is a must.
- The lids will need the general stovetop method for sterilizing.
- Fill each jar with water.
Now for the finale, you must know the basics:
If your mason jar has:
- a liter capacity: one to two minutes in the microwave
- two to four liters capacity: three to five minutes in the microwave
- 4 or more liters capacity: five minutes or more in the microwave
- Always keep in mind to check for the ‘microwave-safe label on every jar.
Bonus Section: Sterilizing Mason Jars in the Dishwasher
Sterilizing your mason jars is a necessity you must fulfill if you want to store any type of food in them. They ensure the foods are in a clean and dry environment. To sterilize your jars in the dishwasher, follow the same steps to rinse them in the machine. After a wash cycle, run a dry heat cycle, and you will have sterilized each jar in one go.
FAQ
1. Uses for a damaged mason jar?
It’s common to damage mason jars at some point. Mainly because they are made of glass. If that’s the case, you can use mason jars to plant trees in them, or turn them into a decorated showpiece. Let your creative genius out and DIY to the farthest extent to turn your broken jar into a decor piece.
2. Why is sterilizing mason jars necessary before preserving food in them?
Sterilizing ensure all moisture is killed. Moisture gives birth to all forms of bacteria, mold, etc. and they ruin the freshness of the foods. The pickles get stale, the sauce doesn’t smell right. Hence sterilizing jars each time before canning is a must.
3. How to avoid mason jar rusting?
Store your jars in a cool space. By the window where there’s plenty of light or inside a cabinet would be a good idea. Hot environments are the most significant factor behind rusting.
4. Can rust on the mason jars be harmful to the food?
Rust, is not toxic in general. However, when preserving food, it is best to use polished lids to avoid the acidic substances of your food coming into contact with rusty lids.
5. Are mason jars recyclable?
Yes, they are absolutely recyclable. You can turn them into flower vases, pot plants, or simply a showpiece for your bookshelf. People buy mason jars as gifts too.